

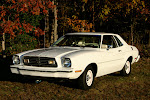
My first major project was the trunk area. The weatherstripping as you can see from the picture (left) was dry rotted and peeling and I didn't like how the backs of the tailights were exposed. I found out that standard coupes didn't come with anything but a simple gray trunk carpet and a round piece of wood covering the spare tire. I wanted a cleaner look, so I purchased a plastic panel that came out of a 1978 Ghia to cover the taillight assemblies.
There was some rust around the trunk lid, so after removing the old weatherstrip (a nightmare!) I used rust treatment on the visible rust, and painted around the trunk lid and in the weatherstrip channel with white Rustoleum.
The next job was to install new weatherstripping, which I got from SSC Enterprises, but it did not go as planned. The weatherstrip dried all twisted in the corners and sticking out of the channel. I was so disappointed because I'd spent forever prepping and painting areas of the trunk and channel only to have the weatherstrip installation botched. I had to pull up the ruined weatherstrip, which thankfully did not cost a lot, but still, and scrape the adhesive off (again!) & repaint. Grr. Fortunately, around that time, I'd picked up a dremel tool with a wire brush and that made it a little easier than the first time.
After this setback I decided not to make a second attempt. Plus the next job would have been to replace the roof rail weatherstrip, which was supposed to be even trickier. So after ordering another package of trunk weatherstripping, I took the car to a body shop nearby and they did the trunk and roof rail for $95.
The last step was to find a jack assembly. The car's original assembly was missing, so I bought a used one from another II owner and the jack assembly is now complete and correct. Plus I bought a new reproduction jack instructions decal and affixed it in the right spot next to the spare tire.
Here are the after shots:


No comments:
Post a Comment